
Do you want to give a spring touch to your decoration? Go for the plant trend, adopting DIY herbaria. On paper or fabric, hanging on a wall. This activity is for everyone, whether you are a plant lover, a seasoned botanist, a student, or a collector, we all have a good reason to create a herbarium. And since the making of a herbarium can also be conceived according to an educational and playful approach, it can become a real creative hobby, accessible to everyone, including children!
It is essential that you remember to respect the flora before creating the herbarium. Obviously, do not collect protected species and take care of the local ecosystem (in these cases, however, nothing prevents you from taking a photo of the plant that, once printed, you can paste in your notebook). You should also avoid collecting many specimens of the same plant or capturing an isolated specimen, as this increases the danger of the plant disappearing: naturalists call it "seasonal destruction."
Why make a herbarium
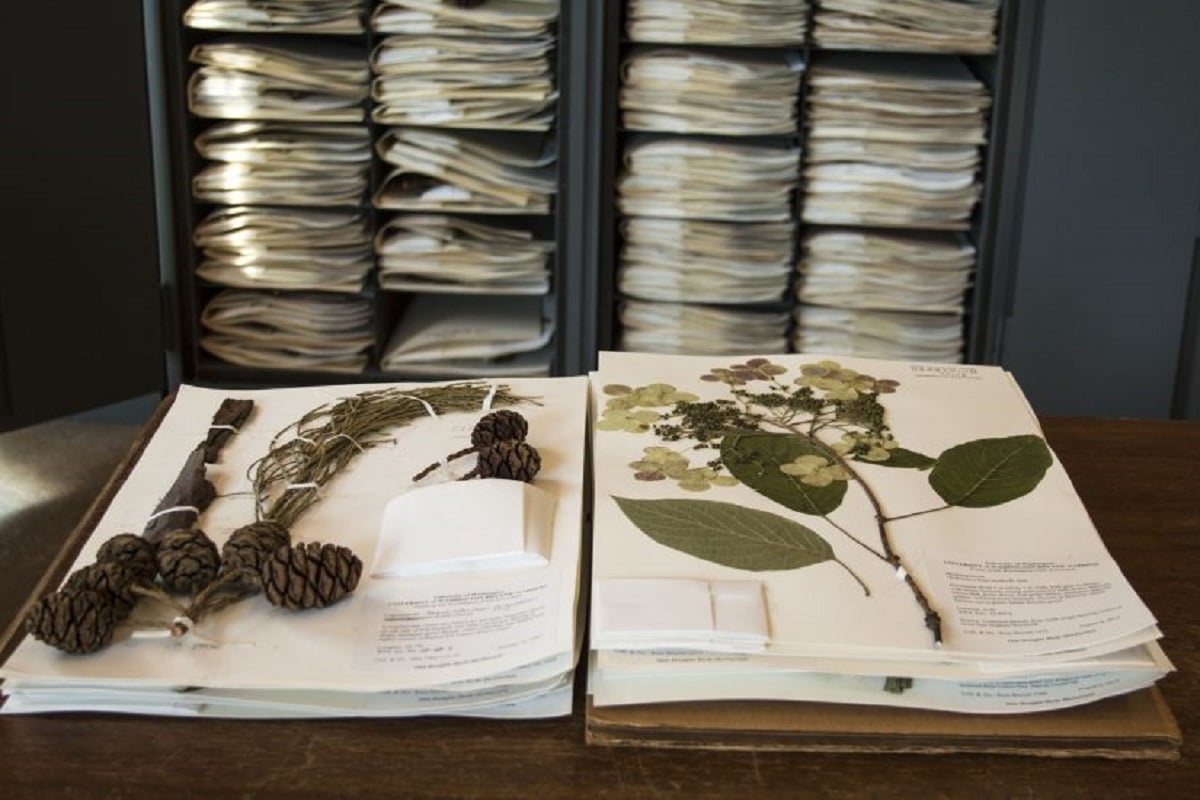
Originally, a herbarium had a scientific, naturalistic vocation: its objective is to gather a collection of plants, as systematic as possible, classified according to very precise criteria, and rigorously identified. It is usually a collection for life. The herbarium can be preserved, in good condition, for several tens, even hundreds of years, and it can be passed down from generation to generation.
But you don't have to go that far to have fun, too you can create a herbarium, simply choosing your favorite plants or focusing on a theme (the plants in my garden, the flora of my region, my collection of grasses, trees), and highlighting them very well in a notebook. Everyone "lives" their herbarium according to their creativity! There are many creative techniques to create an original herbarium. Even if you live in a city and don't have fields or forests nearby, you can still go for artificial plants.
Materials needed to create a herbarium
To start creating your herbarium, you will need:
- Freshly harvested plants;
- A pair of scissors, a small shovel, a notebook, a pencil;
- To dry: newspaper or blotting paper (which can be replaced by large books);
- To stick: silicone, failing that, glue or self-adhesive paper (avoid adhesive tape), a small clip to facilitate handling;
- For the herbarium: large sheets of fairly thick paper can be 29,7x42cm and 12 centimeters thick to classify and store in folders, or a large spiral notebook (at least 24x32cm)
- A box to store your herbarium away from moisture, light, and hungry insects!
How to make a herbarium easily?
Making a herbarium is not difficult, and many children love this informative and entertaining hobby. Also, you may have made one when you were younger, either for fun or for school. Making a herbarium is simple: just place the plants you want, let them dry (flowers, leaves, and a variety of plants) on a piece of paper or newspaper, and then glue them all between the pages of a thick book.
A few weeks later, the plants will be dry and flattened, ready to be pasted into a notebook with your name, your harvest date, or the place of your discovery. The best advice I can give you- Don't harvest the plants on a rainy day as they can rot during drying.
Collection of plants
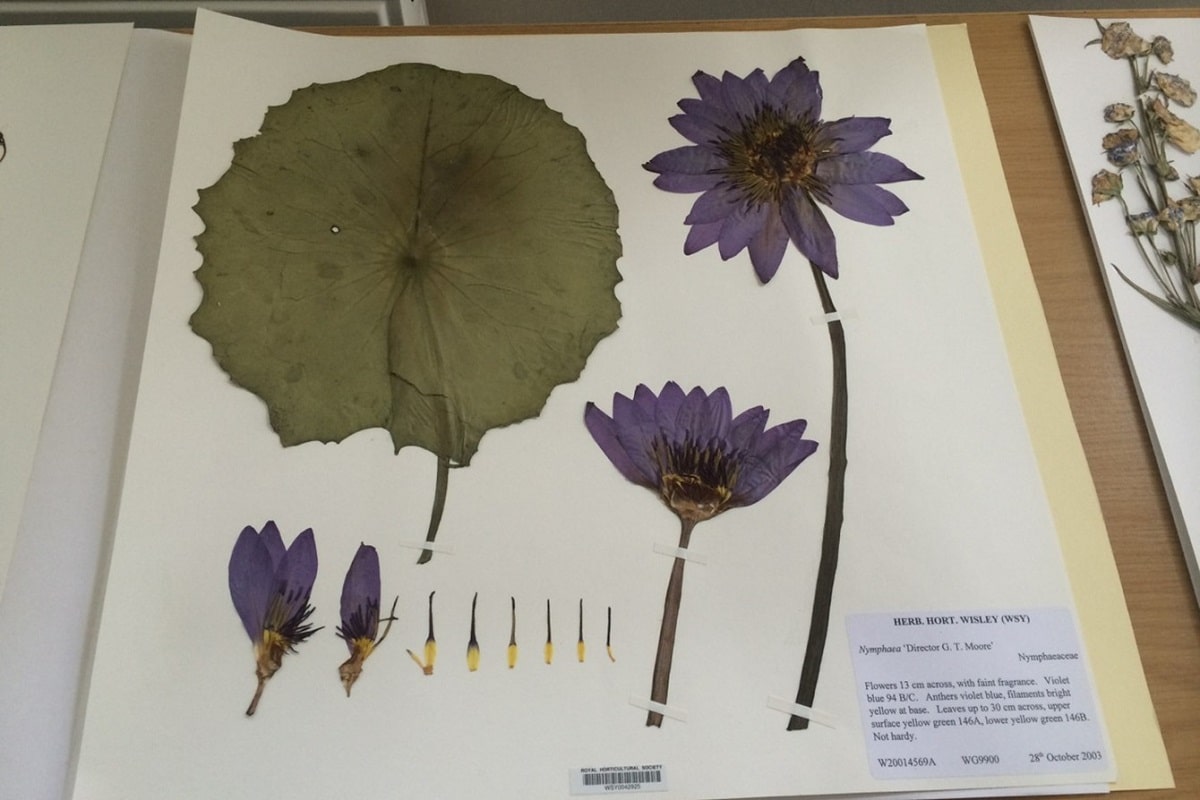
In practice, what part of the plant should be taken and presented in a herbarium? The purists will harvest, whenever possible, the entire plant, that is, with the root system (in Botany, the set of roots of the same plant is called the root system or radical system), hence the usefulness of a small shovel to be able to detach the plant without breaking the roots too much. If the vocation of the herbarium is simply decorative or fun, you can choose a part of the plant, the one that seems most aesthetic or most representative: leaf with its petiole, flower, leafy stem.
It is important to harvest the plant in dry weather, and preferably in the afternoon, when all traces of dew have disappeared: The less moisture there is at harvest, the better the chances of successful drying! Finally, at harvest time, write down in a small notebook all the information that you will need when writing the label, remembering to correctly number the samples, and temporarily place them in individual plastic bags.
Herbarium plants drying
The most delicate and crucial stage is drying. Plants should first be dried as soon as possible after harvest to prevent wilting. Next, you have to flatten them well to be able to store them easily in the herbarium without the leaves curving due to their excessive thickness. Therefore, they should be carefully distributed between sheets of newsprint to dry, highlighting the fascinating elements and avoiding wrinkles, and then placed under thick books.
After about 3 weeks of drying, you should change the newspaper sheets every 2-3 days, then once in the last week of drying, within 1-2 days. This frequency is indicative; It will vary depending on the type of plant, the level of humidity at the time of harvest, the thickness of the sample, etc ... Change newspaper sheets when they are generally wet, which requires some follow-up on your part., especially during the first days (hence the interest in not drying 25 samples at the same time). To repair a bad wrinkle, take advantage of these absorbent paper changes.
Herbarium plants collage and labeling
Once the plant is dry, you can stick it on a leaf. For this, it is best to use, like the real botanicals, pieces of gummed paper (paper that sticks when moistened, for example, with a sponge): this allows the sample to be kept in place and can be detached and pasted several times. without damaging the plant. Otherwise, you can use small strips of self-adhesive paper cut to the desired size, or just white glue (Be careful, some glues "stain" the plant material and are visible through the transparency).
Reserve a space on the page for the labelIf you are considering a scientific herbarium, it is best to print blank label templates, in the form of cards, that you will complete for each plant, this will save you time. and it will give homogeneity to your herbarium. This is the information you must include (The use of the small notebook at the collection site is essential!):
- Scientific name of the plant, botanical family, and possibly vernacular names
- Collector's name
- Harvest number
- Harvest date
- Harvest location location (purists can indicate GPS coordinates)
- Additional information about the place of collection: altitude, type of soil, type of vegetation, etc.
- Information on the characteristics of the plant that cannot be fixed: color, smell, texture, dimensions of the whole plant when only part of it is taken.
Of course, if for you what counts is the emotional or aesthetic resultYou can only indicate the name of the plant, its history, what it symbolizes, its use, and add, if you have a nice touch. Pencil, one or two sketches… You are free to give your herbarium the size you want!